Monday, November 30, 2009

Thinking of You


Happy Monday Morning everyone. I hope everyone had a wonderful weekend. I sure did. I went "Black Friday" shopping with my oldest daughter and niece. Stores were CRAZY but we did find some good deals.

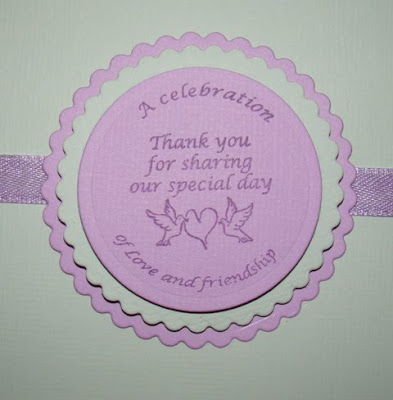
Today I am playing along with Taylor's Friday Sketch challenge shown here. I wanted to make a card other than a Christmas card so I decided to do a "Thinking of You" card. These type of cards come in handy often.

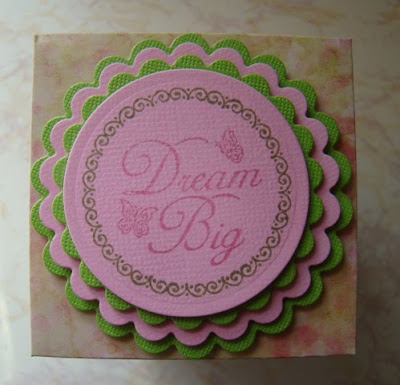
My card base is 7" x 6" and my cardstock is from Worldwin. The decorative paper is called "Moosehead Lake" from Murdock Country Creations. She has a wonderful selection of decorative paper. If you are interested in what Kellie has, please visit her blog http://www.murdocks.typepad.com/ and send her an email.

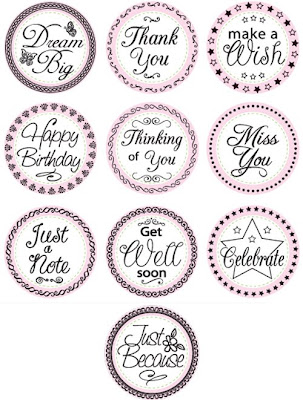
My sentiment is from the "Just A Note" set by JustRite Stampers. I stamped it onto Ivory cardstock and diecut it using the Spellbinders Blossom Nestabilities and matted it onto Sterling polished stone(also available at http://www.murdocks.typepad.com/) and diecut using the Spellbinders Classic Scallop Nestabilities.

My fence border is made using the Martha Stewart Picket Fence border punch.

That's it for today. Don't forget about the Last Minute Gift Ideas blog hop happening at the JustRite Stampers blog on Wednesday. You might find some fast and easy gift ideas for that hard-to-buy-for person on your Christmas list.

Supplies:

Stamps: JustRite Stampers - Just A Note Borders & Centers

Paper: Murdock Country Creations - (Moosehead Lake, Sterling Polished Stone) Worldwin

Ink: Memento Rich Cocoa

Accessories: Spellbinders Blossom Nestabilities & Classic Scallop Circle Nestabilities, Martha Stewart Picket Fence border punch, pop dots

Friday, November 27, 2009

Mass Produced Christmas Tags

Happy Friday everyone. I hope everyone had a wonderful Thanksgiving. I know that I did. We had dinner at my house this year. Lots of family and lots of food = a good time. Of course everyone ate way too much so luckily Thanksgiving is only once a year.


Now that Thanksgiving is over, it is time to jump head first into Christmas. Today I am doing Black Friday shopping with my oldest daughter and my oldest niece. Should be an interesting day.


I did get a chance to play along with Sharon Johnson's Friday Challenge which is to "Mass Produce" a Christmas card. Since I don't have a need for lots of Christmas cards, I decided to mass produce Christmas tags.


The perfect combination of tools for mass production is Cricut Expression and JustRite Stamps.


These 2 photos show my tags that I cut using my Cricut Expression with the "Fill Page" option. This option is awesome. All I needed to do was choose my tag and size (which is 3"), click "fill page" and then cut. The Cricut figures out how many will fit on the page and cuts them out all at once. How much easier can it get!!!!

The top photo is the tag mat. The bottom photo is the actual tag.


After my tags were cut, I glued the white tag onto the red tag. Then to finish off the mass production, I loaded my small rectangular wood stamper with the 25 point Curlz Font and began stamping. Using JustRite Stamps for this purpose is great!!! Just need to load your wording once, and stamp as many times as you need. Very quick and easy.


Here is a closeup view of my tag. The Christmas stocking was actually cut out when the white tag was cut and then when I added the red mat, it makes the stocking stand right out. So cute!!!


Thanks for stopping in for a visit today. Have a great weekend!!!


Supplies:


Ink: Memories Cherry Red

Accessories: Cricut Expression with Christmas Cheer cartridge, gold cording

Wednesday, November 25, 2009

2Sketches4You challenge


Today I am playing along with the sketch challenge on 2Sketches4You. This week's sponsor is JustRite Stampers. All entries have a chance to win some really cool JustRite Stamps. Be sure to stop over today and check it out.


I decided to make a birthday card. I tend to give out more birthday cards than any other type of cards. I am still trying to increase my stash of cards so sketch challenges are always a good place to start. When I do sketch challenges, I know that my cards are going to vary and not all look the same.


My card base is DCWV topped with Basic Grey. My corner is diecut using Sizzix corner dies. I added Kaiser pearls along the scrolls.
My stamped image is from the Birthday Wishes Borders & Centers set by JustRite Stampers. I stamped the center with Fuchsia Ink and the border using Versamagic Hint of Pesto. Each layer is diecut with Spellbinders Nestabilities separately with popdots between each layer to add lots of dimension. Finally I added Kaiser pearls around my scalloped edge.
Thanks for stopping in for a visit today. I hope everyone has a wonderful Thanksgiving tomorrow.
Supplies:
Paper: DCWV, Basic Grey
Ink: Fuchsia, Versamagic Hint of Pesto
Accessories: Spellbinders Classic Circles & Scallop Circle Nestabilities, Sizzix corner, Kaiser pearls, Creative Impressions ribbon, pop dots

Tuesday, November 24, 2009

I WON!!!!!!

Oh my gosh!!! I actually won something. I am soooo excited. You can see the announcement here. I entered my Santa & Sleigh in the JustBuggin challenge and won. I love to make 3-D projects out of paper and to get this recognition is awesome. Check out the cool badge on my sidebar. That is very cool!!!


Thanks to everyone at JustBuggin' for having these great challenges. I look forward to entering many, many more.

PTO Pie Sale

Good Morning everyone. Today I have a very simple project. My daughter's school is having a PTO pie sale today. The school always has this pie sale before Thanksgiving so that the community can help the school raise money at the same time that they are helping themselves by not having to bake pies for Thanksgiving dinner. Parents are asked to donate a homemade pie. I always sign up for this fundraiser because there are other fundraisers that I cannot take part in. I usually make Chocolate Cream Pie (because it is the easiest pie to make). After I finished the pie, I looked at it and thought it was WAY TOO PLAIN. I wanted to dress it up so that it would stand out among the other pies.
To do this, I grabbed my Autumn Blessings set by JustRite Stampers. This sentiment is perfect for Thanksgiving. It is stamped onto ivory cardstock and diecut using Spellbinders Labels Eight. I made a simple belly band for the pie, attached the sentiment and added a simple bow.


Here is a closeup of the sentiment. Very simple yet gets the point across. The best blessings are usually the simple ones.

I hope everyone will take time to count their blessings today. Sometimes we don't take time to slow down and realize how very fortunate we really are.

Thanks for stopping in for a visit today. I feel very blessed to have online blogging friends that come back day after day to check out my creations.

Supplies:

Stamps: JustRite Stampers - Autumn Blessings Borders & Centers

Ink: Versamagic Jumbo Java, Versamagic Pumpkin Spice

Accessories: Spellbinders Labels 8, misc ribbon

Monday, November 23, 2009

Christmas Stocking

Happy Monday morning everyone. I hope everyone had a wonderful weekend. This week is going to be very busy for me. I will be having Thanksgiving Dinner at my house this week. Lots of cleaning and organizing to do.

But I did have time to play along with the Technique challenge on Splitcoaststampers today. These little gift card holders are sooo cute!! I give a few gift cards at Christmas but always am a little torn about how to present them. I would prefer to actually buy a gift because it seems more personal but some people are very difficult to buy for. So now I can make these cute holders and personalize them for my family.

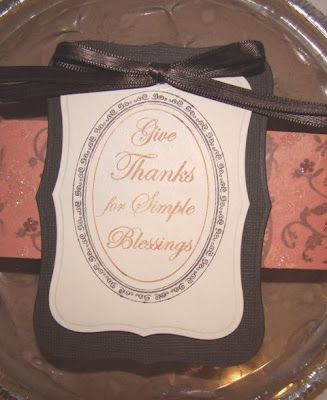
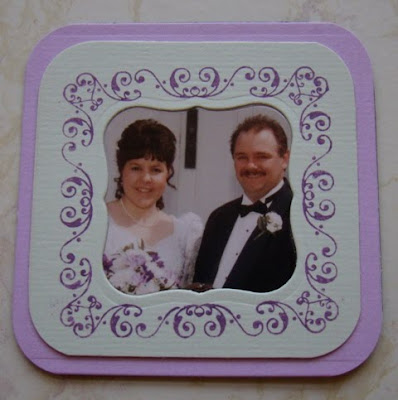
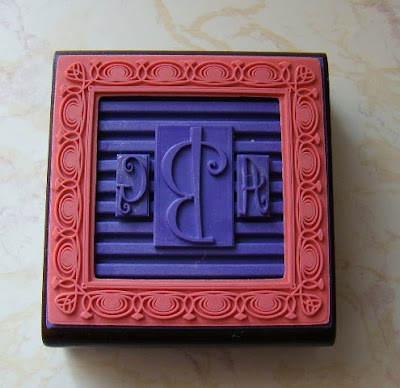
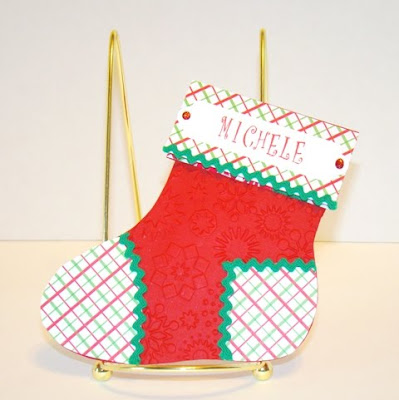
And what better way to personalize these than with my JustRite Stamps!!! For these I chose one of my favorite font sets - the Curlz Font in 50 point. Then I diecut it using the Spellbinders Double ended tags.


The bottom portion of my stocking is embossed using the Cuttlebug Snowflakes embossing folder. I was going to stitch around the toe and heel, however when I pulled out my mini sewing machine it decided that it did not want to work!!! I have only used it ONCE!!! And of course I don't have the box or receipt to return it. Oh well, lesson learned. I dug through some of my rick rack stash and found some green that worked well.
That's it. Very simple yet personal. Thanks for stopping in for a visit today.
Supplies:
Stamps: JustRite Stampers - Curlz Font Ensemble
Paper: DCWV Christmas Stack, Worldwin
Ink: Memories Cherry Red
Accessories: Spellbinders Double Ended Tags, Cuttlebug Snowflakes embossing folder, red Stickles, rick rack

Friday, November 20, 2009

Monogram Candle Set

Happy Friday everyone!! The weekend is almost here. The weather here in Maine is suppose to be really nice. I like the mild temperatures.

Today I am playing along with Sharon Johnson's Friday Challenge. The challenge is titled "All Wrapped Up". She is challenging everyone to share gift wrapping ideas. I saw these candles at Walmart so I decided to use these as my gift and to create boxes to put them in.


The paper I chose is polished stone from Murdock Country Creations called "Cranberry". This polished stone is beautiful and much easier to use than making your own polished stone. It also comes in a variety of colors. If anyone is interested in what colors are available and how to buy some, check out Kellie's blog here and send her an email. She also has some beautiful scenery paper like I used here.


The above box holds candles that are approximately 5 1/2" tall x 2 3/4" in diameter. I used the Martha Stewart Arch Lattice Border punch for the wrap around the candles as well as around the top edge of my box. The monogram "H" is the Damask set from JustRite Stampers.


This box holds 6 votive candles. It measures 4 3/4" x 3 1/4". The box top also uses the Damask Stamp Set as well as the Martha Stewart Arch Lattice border punch.


This box hold 2 taper candles. It measures 13" long X 2" wide. The windows on the box top were diecut using Spellbinders Labels 4.
Thanks for stopping in for a visit today. Have a wonderful weekend.

Supplies:
Paper: Murdock Country Creations - Cranberry Polished Stone, Worldwin
Ink: Brilliance Graphite Black
Accessories: Spellbinders - Classic Circle & scallop Circle Nestabilities, Labels 4, Labels 8, Martha Stewart Arch Lattice Border Punch, Creative Impressions ribbon, pop dots, candles

Wednesday, November 18, 2009

Here Comes Santa!!!

Good morning everyone. Today I have a 3-D project to show you. I love to make 3-D projects, especially for Christmas. I don't know what I am going to make after Christmas is over. I thought of this after a trip to Michael's on Saturday. I saw a Sizzix sleigh die and thought "I can do that with my Cricut". So when I got home, I got to work.

I also found out about a cool blog called Just Buggin' that has Cricut challenges so I decided to enter my Santa & Sleigh. The challenge (Challenge # 11) is to create something using an animal Cricut cartridge. I think my "Rudolph" fits in to an animal.


All of the parts (sleigh, reindeer, Santa) are from the Cricut Paper Dolls Dressup cartridge. All of the presents are cut using the Tags, Bags, Boxes & More cartridge. The snowflakes on the sides are from the Accent Essentials cartridge.


I decided that the side of the sleigh needed a little something more so that was when I grabbed my JustRite Stamps and spelled out "North Pole" using my 50 point Culz Font. I stamped it onto white cardstock and then diecut it using the Spellbinders Labels Six.
For stability, I adhered my reindeer & sleigh onto pieces of chipboard and then covered the chipboard with pillow stuffing. It looks like Santa is gliding through a field of snow.
I am really happy with the way this turned out. I guess it was worth the hair-pulling late night hours. It will look really cute on my Christmas Table.
Thanks for stopping in for a visit today. I really appreciate it.
Supplies:
Stamps: JustRite Stampers - Curlz Font Ensemble
Paper: DCWV, scraps of printed paper
Ink: Memories Cherry Red
Accessories: Cricut Expression, Accent Essentials, Tags, Bags, Boxes & More, Paper Dolls Dressup cartridges, Spellbinders Labels Six, misc ribbon, tiny bells, Kaiser rhinestones, pop dots, stuffing, chipboard, wiggle eyes, red Stickles

Tuesday, November 17, 2009

N*O*E*L


Welcome to the JustRite Stampers "IT"S HIP TO BE SQUARE" blog hop. Today we are celebrating the release of the new stamps including the new 2" square wood stamper. This new shape is going to make your JustRite stamps so much more interchangeable!!

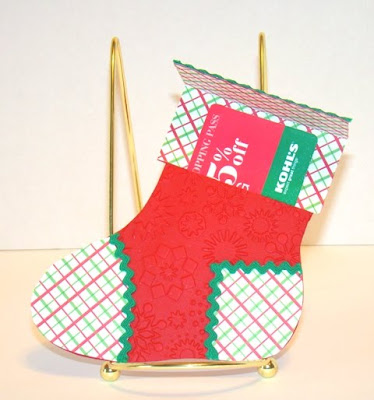
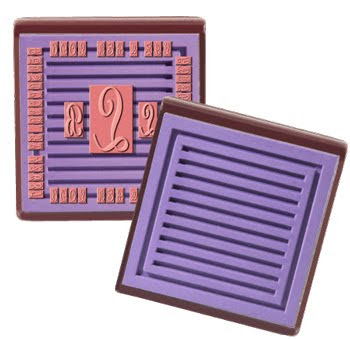
These new square borders are awesome. And all of your 1 5/8" stamps will fit in the centers. This takes the term "interchangeable" to a whole new level.


The new release also has some new round borders that are really cute. These round borders are what I chose for my project today.


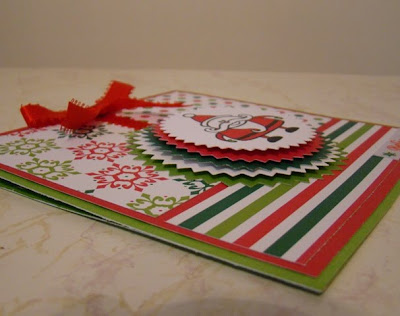
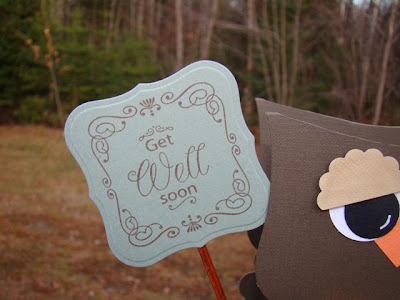
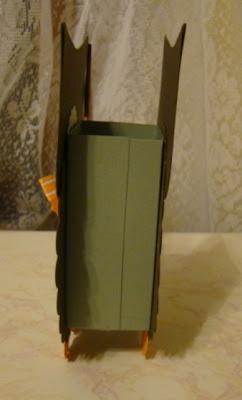
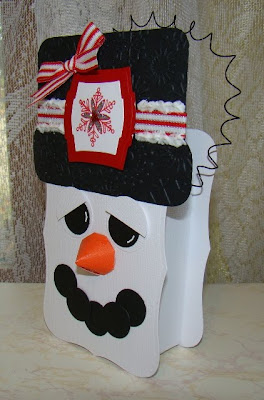
My project is a door banner that I made using the new 2" Round Decorative Frames Borders. These borders can be used for elegant projects or playful projects.


The above photo shows the dimension of my banner.

To make each letter, I loaded my 2" wood stamper with a Decorative Frame Border and a 95 point letter from the Curlz Font Ensemble, stamped it onto white cardstock using Memories Cherry Red ink. Next I diecut each letter using the Spellbinders Classic Circle Nestabilities. I used a smaller Nestabilities to diecut the letter out of the border and popped it up.


To make the "fan" that each letter is mounted on, I took 2 pieces of white cardstock 12" long and punched a border using the Martha Stewart Loops border punch, inked the edges, and then followed the tutorial found here at Splitcoaststampers. This tutorial is very easy to follow and gives lots of dimension to my banner. Once each "fan" was created, I diecut 2 different sizes of circle nestabilities and adhered the fan.

My banner ribbon is 2 1/2" wide by 22" long. Because the ribbon seemed "floppy" I adhered chipboard to the back for stability.

That's all there is to it. Very simple project that will look amazing on any holiday door. Enjoy the rest of the JustRite blog hop. These designers are just amazing. I can't wait to try some of their projects.
Angela Barkhouse (that's me)

Supplies:
Paper: American Crafts
Ink: Memories Cherry Red, Versamagic Hint of Pesto
Accessories: Spellbinders Classic Circles Nestabilities, Martha Stewart Loops Border punch, misc ribbon, chipboard, Scor-Pal, popdots

Monday, November 16, 2009

Believe

Good Morning Everyone. I hope everyone had a great weekend. Today I am playing along with Taylor's Friday Sketch Challenge. You can check it out and play along too by clicking here:

Isn't my chubby Santa adorable?? And he was only $1.00 at Michaels. That makes it even better. I stamped him onto Neenah cardstock and colored him with Copic Markers. Then I diecut several layers using Spellbinders Pinking Circles. Pop dots between each layer makes my Santa look like he is coming off of the card.


I've got to keep the post short today because my electricity has been going off & on due to the wind. I will be back tomorrow for the JustRite New Release blog hop. Be sure to stop in and check out the new stamps. You are going to LOVE them!!!

Supplies:
Stamps: Michael's Dollar bin
Paper: American Crafts

Ink: Memento Tuxedo Black, Copic markers (R29, R85, 100, YG17)

Accessories: Spellbinders Pinking Circles, misc ribbon, pop dots

Saturday, November 14, 2009

Wedding Favor


Good Morning Everyone. The weekend is finally here!!! Today is going to be a trying day. We are taking our 9 year old daughter to get her H1N1 flu shot today. I'm not sure who is more nervous - her or me. I'm sure everything will go fine and then I will feel much better knowing that she has been vaccinated.

Today I am playing along with Sharon Johnson's challenge which is to make a matchbook. I think the only "rule" that I broke was to make it simple. I have a really hard time doing "simple" things. You can check out the details here. I made this matchbook to be used as a wedding favor at the wedding reception for the guests to take home with them. I used purple and green because these are the same colors that I had at my wedding 12 years ago.


My matchbook measures 4" wide by 9" long and is scored at 3 3/4", 4", & 7 3/4". I used the Martha Stewart Arch Lattice border punch to place at the bottom portion of my matchbook.


All of my stamps are from JustRite Stampers. I wish that I would have had these stamps when I got married. I made all of my own wedding favors and table decorations. These stamps would have made it soooo much easier.


These stamps are from the Wedding Stamp Ensemble and diecut with Spellbinders Nestabilities. My married name was stamped using the Curlz Font Ensemble also from JustRite Stampers.


On the inside, I decided to make a magnet that wedding guests could have as a keepsake. The stamped image is from the new 2" Square Decorative Frame Borders from JustRite Stampers coming out next week. These new sets are soo awesome!!!
Also, be sure to check out the blog hop that is going on with the JustRite Stampers Design Team happening on November 17th. They will all be using these new stamps. I am sure that their projects are going to be amazing (as usual).

Thanks for stopping in for a visit today. I hope everyone has a wonderful weekend!!

Supplies:


Paper: Worldwin

Ink: Versamagic Purple Hydrangea

Accessories: Spellbinders - Classic Circle & Scallop Circle Nestabilities, Labels One, Classic Squares, Double Ended Tags, Labels Trio, Martha Stewart Arch Lattice border punch, Kaiser rhinestones, misc ribbon, pop dots, SU corner rounder, magnet

Tuesday, November 10, 2009

Get Well Soon


Hello everyone!!! Sorry I haven't posted for a few days. I have been without internet for 2 days. I have been going stir crazy!!! It is amazing how much we depend on the internet and how much we miss it when it is gone. Luckily it was only 2 days.

Today I have created this cute owl box. I think he is sooo cute!!! He also fits into the challenge on Embellish Magazine found here. The body is made from Spellbinders Scallop Circle Nestabilities, the head is diecut from Spellbinders Labels 8 folded in half. The feet are cut using SU 1 1/4" scallop circle punch as was the eyelids.


To make the box, take a piece of cardstock 8 1/2" x 4 1/4", score each narrow end at 1" and each long end at 3 1/2".


My "Get Well Soon" sign was made with the new "Just A Note" stamp set as well as the new 2" square wood stamper from JustRite Stampers coming out mid-November. The borders are square and the centers are round. Now my stamps have more options by combining square and round together. Can't get any better than that!!! After I stamped my sentiment, I diecut it using the Spellbinders Labels 1 and adhered it to a skewer.


Thanks for stopping in for a visit today. I hope you all have a wonderful day.

Supplies:

Stamps- JustRite Stampers - Just A Note Centers & Borders, 2" wood stamper

Paper - Worldwin

Ink: Memento Rich Cocoa

Accessories: Spellbinders Labels 1 & Labels 8, SU 1 1/4" scallop circle, 1" circle, 3/4" circle, Cuttlebug D'vine Swirls,

Saturday, November 7, 2009

Frosty The Snowman


Isn't this little snowman the cutest thing you have ever seen!!! And he was so easy to make. I found a great tutorial here.

I adjusted my little snowman a bit by adding a "belt buckle" to his hat using the snowflake from the Merry Little Christmas set by JustRite Stampers. It is stamped onto white cardstock using Memories Cherry red ink and I added red & silver stickles to the snowflake. Along the edges of the ribbon, I added some"snow" so that the snowman wouldn't get too warm.


I'm thinking these would make cute craft projects for my daughter's class at school. I have been asked to create and teach a craft by her teacher.

Have a great day!!!

Supplies:

Stamps: JustRite Stampers - Merry Little Christmas, 1 5/8" wood stamper

Ink: Memories Cherry Red

Accessories: Spellbinders Labels Two, Spellbinders Labels Eight, Cuttlebug Snowflakes embossing folder, SU 3/4" & 1" circle punches, SU scallop circle punch, Stickles - red, Silver, glitter snow, misc ribbon, misc black wire

Friday, November 6, 2009

Monogrammed Box

Happy Friday morning everyone!!! It is a beautiful day (except for the snow that we got last night!!) The trees do look really pretty with snow on them but it is SNOW - which I don't care for.

Today I decided to play along with Splitcoaststampers Holiday Tutorial Blitz. They are having some really cool tutorials so be sure to check them out.

If you would like to make one of these boxes, go to the tutorial here. My box is made from paper called "Peppermint Twist" by Murdock Country Creations. This paper is so cool especially if you don't know how or don't have the time to make your own polished stone paper. If you would like to purchase some - go here for contact information.

I used the Spellbinders Square Nestabilities to make my opening. I stamped my monogram onto vellum using the "NEW" 2" square wood stamper, 2" Decorative Frames Borders, and the Curlz Font Ensemble from JustRite Stampers. These new sets will be available mid-November. These new stamps are going to make the JustRite Stamps even more versatile because they can be interchanged with some of the round stamps.

For the box top, I used one of the new centers from the new Just A Note Center & Border set, and diecut several scallop layers using the Spellbinders Classic Scallop Nestabilities. Each layer has pop dots to add lots of dimension. To finish off the box top, I used the Martha Stewart Loops border punch and Lime Green Stickles.


Here is a sneak peak at what these new sets look like.
Also be sure to check out the JustRite Stampers blog for a chance to win blog candy and to see all of the new stamp releases.

Thanks for stopping in for a visit. I hope everyone has a wonderful weekend.

Supplies:

Stamps: JustRite Stampers - Just A Note Centers & Borders, 2" square wood stamper, Curlz Font Ensemble

Paper: Murdock Country Creations Peppermint Twist polished stone, DCWV

Ink: Brilliance Pearlescent Orchid, Memento Bamboo Leaves

Accessories: Spellbinders Classic Circle & Scallop Circle Nestabilities, Martha Stewart Loops border punch, Lime Green Stickles, vellum